This post is part of the C# Advent Calendar 2021. Be sure to check out all the other great posts there this month!
The Microsoft Graph allows developers to query information from Microsoft 365, including data about users, mail, Teams, OneDrive, notes, and lots more. I’ve been exploring the user and teamwork APIs recently, but in this introduction we will explore how to authenticate and retrieve some user attributes for the authenticated user account.
The sample is a WinUI application created with the Windows App SDK, C#, .NET, and the .NET Graph SDK that will authenticate a Microsoft Account and display the name & email address for the authenticated user.
Start by installing the Visual Studio 2022 workload for .NET Desktop Development and check the option for the Windows App SDK C# Templates to add the project templates to your IDE. Complete instructions for getting started with the latest SDK can be found here.
Next, create a new Blank App, Packaged (WinUI in Desktop) project in Visual Studio. I am using Visual Studio 2022, but 2019 is also supported:
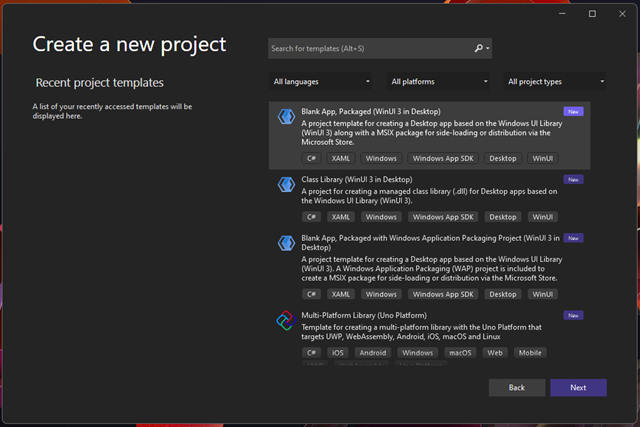
Figure 1 – Creating a new WinUI project
After the project has been created, it’s always a good practice to run it to make sure things are working out of the box. Now we will add the NuGet packages needed to build our WinUI Graph app:
- Azure.Identity – Used for interactive MSAL authentication
- Microsoft.Extensions.DependencyInjection – Our DI container of choice for this app
- Microsoft.Graph – The .NET Graph SDK package
- Microsoft.Toolkit.Mvvm – A lightweight, open source MVVM framework
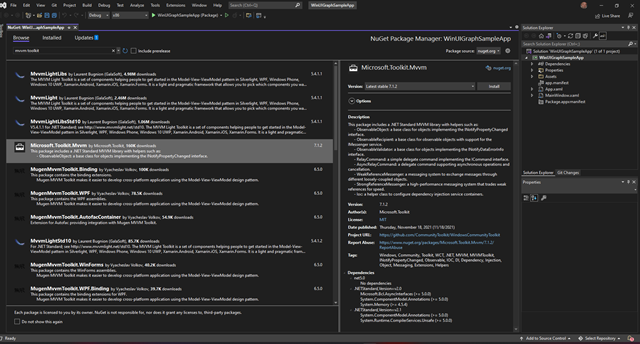
Figure 2 – Installing the Microsoft.Toolkit.Mvvm package
Install the latest stable version of each of these packages and build the project again. We’re going to start building the app by creating a GraphService class and an IGraphService interface with one method, GetMyDetailsAsync().
public interface IGraphService
{
     Task<User> GetMyDetailsAsync();
}
The method will return a Task of Microsoft.Graph.User. We’ll get to the implementation in a moment, but first we will create an Initialize() method that will be called in the constructor. This is where the authentication code is executed.
private readonly string[] _scopes = new[] { "User.Read" };
private const string TenantId = "<your tenant id here>";
private const string ClientId = "<your client id here>";
private GraphServiceClient _client;

public GraphService()
{
     Initialize();
}

private void Initialize()
{
     var options = new InteractiveBrowserCredentialOptions
     {
         TenantId = TenantId,
         ClientId = ClientId,
         AuthorityHost = AzureAuthorityHosts.AzurePublicCloud,
         RedirectUri = new Uri("http://localhost"),
     };

    var interactiveCredential = new InteractiveBrowserCredential(options);

    _client = new GraphServiceClient(interactiveCredential, _scopes);
}
Using a TenantId in the authentication is only necessary if you want to restrict authentication to a single tenant. To read more about using Azure.Identity and MSAL, check out the docs here. The “User.Read” scope is required to access Graph data for the User object. You can read a complete list of Graph permissions here. The other aspect of using these permissions within your application is that you must have an App Registration in Azure with each required scope granted to the app in the registration. Follow these steps (under Option 2) to add your App Registration to your Azure account in the portal. This is where you will find your ClientId to enter above. Desktop applications will always use “http://localhost” as the RedirectUri.
Now we’re ready to create the implementation to get our User object.
public async Task<User> GetMyDetailsAsync()
{
     try
     {
         var user = await _client.Me.Request().GetAsync();
         return user;
     }
     catch (Exception ex)
     {
         Console.WriteLine($"Error loading user details: {ex}");
         return null;
     }
}
The code here is straightforward. Using the GraphServiceClient’s fluent API, we’re requesting “Me” to be returned asynchronously. “Me” will always return a User object for the current authenticated user.
Next, create a MainViewModel class, inheriting from ObservableObject in the MVVM Toolkit. This is the ViewModel for the MainWindow that was created as the main window by the WinUI project template. Use this code for MainViewModel.
public class MainViewModel : ObservableObject
{
     private string _userName;
     private string _email;

    public MainViewModel()
     {
         LoadUserDetailsCommand = new AsyncRelayCommand(LoadUserDetails);
     }

    public async Task LoadUserDetails()
     {
         var graphService = Ioc.Default.GetService<IGraphService>();
         var user = await graphService.GetMyDetailsAsync();
         UserName = user.DisplayName;
         Email = user.Mail;
     }

    public string UserName
     {
         get { return _userName; }
         set { SetProperty(ref _userName, value, nameof(UserName)); }
     }

    public string Email
     {
         get { return _email; }
         set { SetProperty(ref _email, value, nameof(Email)); }
     }

    public IAsyncRelayCommand LoadUserDetailsCommand { get; set; }
}
The ViewModel has properties to expose the UserName and Email that will be retrieved from the IGraphService call when LoadUserDetails is called and the service is fetched from the DI container. Now let’s set up the DI container in App.xaml.cs in the constructor after InitializeComponent().
Ioc.Default.ConfigureServices
         (new ServiceCollection()
             .AddSingleton<IGraphService, GraphService>()
             .AddSingleton<MainViewModel>()
             .BuildServiceProvider()
         );
This is registering GraphService and MainViewModel as singletons in the container. Any call to GetService will fetch the same instance. This works for us because we will only have one MainWindow and we only want to authenticate once during the lifetime of the application.
It’s finally time to work on the UI. Start by opening MainWindow.xaml and use the following markup at the root of the Window, replacing the existing controls.
<Grid x:Name="MainGrid" HorizontalAlignment="Left" VerticalAlignment="Center" Margin="12">
     <Grid.RowDefinitions>
         <RowDefinition Height="Auto"/>
         <RowDefinition Height="Auto"/>
         <RowDefinition Height="Auto"/>
         <RowDefinition Height="Auto"/>
         <RowDefinition Height="*"/>
     </Grid.RowDefinitions>

     <TextBlock Text="User name:" Margin="4" Grid.Row="0"/>
     <TextBox Text="{Binding Path=UserName}" Width="200"
              Margin="4" Grid.Row="1" IsReadOnly="True"/>
     <TextBlock Text="Email:" Margin="4" Grid.Row="2"/>
     <TextBox Text="{Binding Path=Email}" Width="200"
              Margin="4" Grid.Row="3" IsReadOnly="True"/>
     <Button Command="{Binding Path=LoadUserDetailsCommand}"
             Margin="4" Content="Load Data" HorizontalAlignment="Right" Grid.Row="4"/>
</Grid>
We’ve created a parent Grid named MainGrid with five rows, two TextBlock controls and two corresponding TextBoxes, and a Load Data Button. The two TextBox controls have their Text properties bound to the UserName and Email ViewModel properties, and the Button’s Command is bound to the LoadUserDetailsCommand, which calls LoadUserDetails().
Now let’s get the MainViewModel from the DI container in the MainWindow.xaml.cs code behind file and set it as the MainGrid.DataContext. This will complete our data binding for the window.
var viewModel = Ioc.Default.GetService<MainViewModel>();
MainGrid.DataContext = viewModel;
That’s it. You’re ready to run the app. When you click Load Data, you should be prompted to log in to a Microsoft account and accept the scopes required by the app.
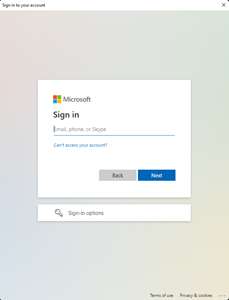
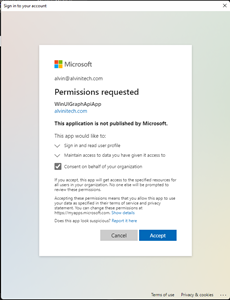
Figure 3 & 4 – Logging in to access the Graph API
Once the login is complete, you should see your username and email address populated in the text fields. We’ve done it! And notice how the WinUI window and controls pick up your Windows theme and other UI appearance without any extra markup or code required. I’m using the dark theme in Windows 11, and my app is as well.
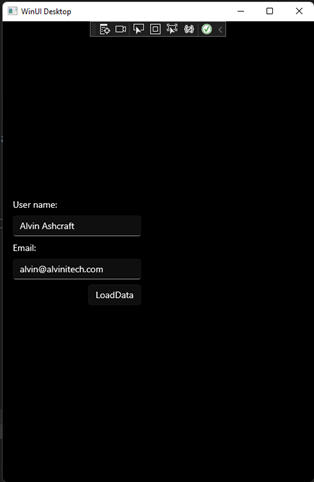
Figure 5 – Displaying the user info in our app
You can do so much more with the Graph API, using the .NET SDK or the REST APIs. Be sure to explore the docs to see what data you might want to leverage in your own apps. You can also test your API calls with the Microsoft Graph Explorer site. To learn more about WinUI, you can also check out my book from Packt Publishing, Learn WinUI 3.

Get the source code for this WinUI app on GitHub to get started with WinUI and the Graph SDK on your own.
Happy coding and happy holidays!
 Microsoft Azure Architect Technologies and Design Complete Study Guide: Exams AZ-303 and AZ-304 (William Panek & Benjamin Perkins) – Referral Link


